

AzentaTransfer User Guide
Tip: Click the "Start the guide" button above to quickly view the steps for use.
Download and Launch the Software
Download AzentaTransfer_windows_amd64.zip, unzip and double-click to launch the software.
Login with TransferCode
Open the TransferCode hyperlink in the email, click to copy the TransferCode, enter 1 in the software to select the TransferCode login method, paste and press Enter.
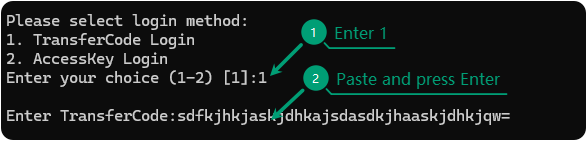
AzentaTransfer supports two login methods. We recommend using the TransferCode login method as it's quick and convenient. The AccessKey login method requires configuring AccessKeyId, AccessKeySecret, OSS path, and region. For details, please expand the section below.
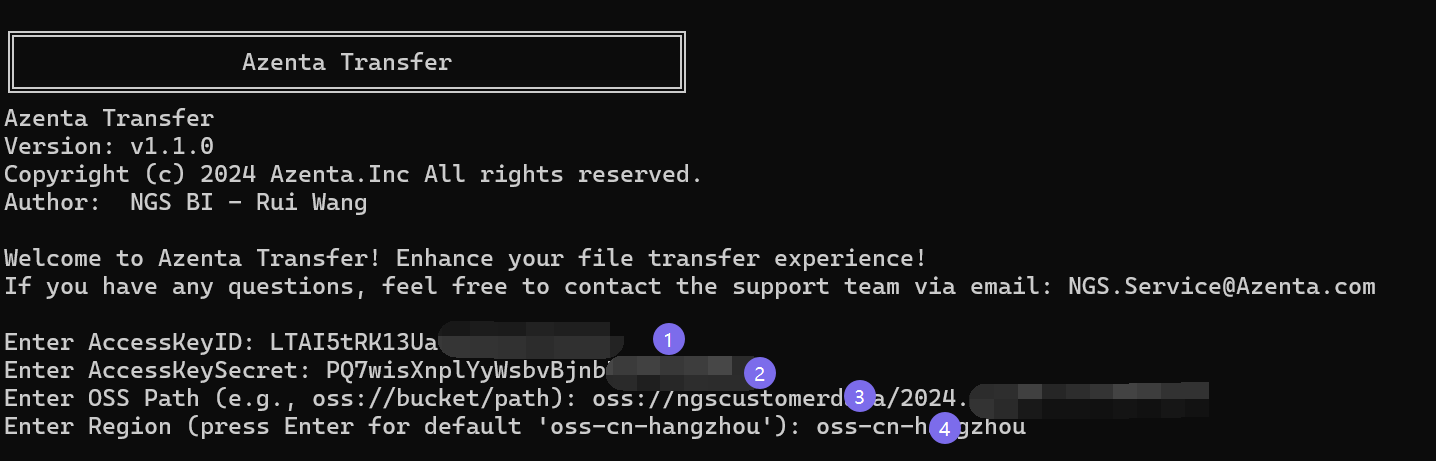
AccessKey Login Method
Enter
2 in the software to select the AccessKey login method, then enter AccessKeyId, AccessKeySecret, OSS Path, and Region sequentially, then press Enter.
Select Project Delivery Folder
After successful login, the available project folders or file list will be displayed.
-
Download specific folder:
- You can select a specific folder or file by entering the corresponding number (e.g., 1 or 2 ...).
-
Download all displayed items:
- To download all displayed items, simply press Enter.

Select Local Save Path
-
Preparation before download:
- It is recommended to create a dedicated local folder before downloading. The folder name should reflect project characteristics or analysis batches.
-
Specify save path:
- Drag and drop: Directly drag the target folder to the command line window.
- Copy path: Copy the complete folder path and paste it into the command line window.
Proper folder naming helps with subsequent file management and searching.
Wait for Completion
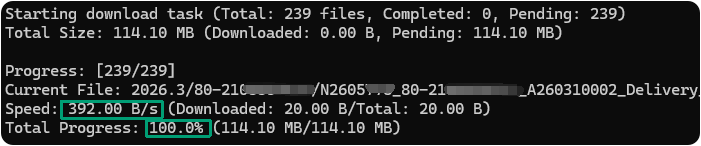
Please ensure you have sufficient local disk space, otherwise the download will fail.